For many novices, learning photography begins with mastering nature and landscape images. This may be due to the quiet that allows for a better mastery of camera settings and understanding of exposure.
Nevertheless, landscape photography has been one of the most popular genres for many years, with both beginners and professionals working in it. However, even experienced photographers often encounter difficulties.
Today, we’re going to show you how to take beautiful landscape photos, even if you’re picking up a camera for the first time. Our recommendations will be useful for professionals as well because sometimes just one little thing can make a shot stunning.
Let’s also say right away that in landscape photography it’s especially important to use HDR photo editing, otherwise, you just can’t get a great shot. If you are just looking for the best software, you should try a one-stop AI HDR software for nature photography like Luminar Neo.
Always Plan Your Photography Session
The first tip is probably obvious, but many photographers just leave it out. It’s simple — always try to plan your photography session.
You don’t want to arrive a few minutes before sunset because you won’t have time to set up your tripod, adjust your camera, and get the best angle. So try to get there early.
Sometimes it’s a good idea to have plenty of time to get there (it would be a shame to miss the beautiful shot because of traffic or a flat tire). Here are some tips to help you plan your photo session:
- Defining your purpose can help guide your planning process and ensure that you stay focused on your goals.
- Research your location ahead of time to find the best spots to take pictures, and plan your route to avoid wasting time and energy.
- Consider the time of day as well as the potential for changing weather conditions when planning your sessions.
- Make sure your equipment is in good working order and that you have backups in case of malfunction.
- Once on location, take the time to adjust your camera settings based on your purpose and the conditions of the environment.
- Consider the timing of your trip, especially if you plan to capture a particular natural phenomenon, such as sunrise or sunset.
Speaking of sunsets, if you want to capture that golden hour, remember that you can’t do it without post-processing, especially in the case of a landscape.
For example, HDR photo editing is a technique that combines multiple images of the same scene taken at different exposures to create a final image with a wider range of brightness and detail than a single image could capture. In Luminar Neo, you can do this with just a few clicks.
Carefully Choose Your Location
Choosing the right location is the most important thing in landscape photography because this is your subject. Explore, research, and look for new places to photograph.
Sometimes you will come across complete nonsense, but keep looking for exciting places with interesting subjects to focus on.
You may have to walk or drive a long way, but it will be worth it. The point is, you don’t have to be lazy to find that one view that will be the reward.
That’s the whole point of landscape photography — you have to look and see. Sometimes nonsense will come along, but otherwise, you’ll just have to shoot the same mediocrity over and over again.
But if you go back to where you’ve already shot, you can find a new angle or see things in a new way. For example, seasonal differences justify photographing in the same place over and over again.
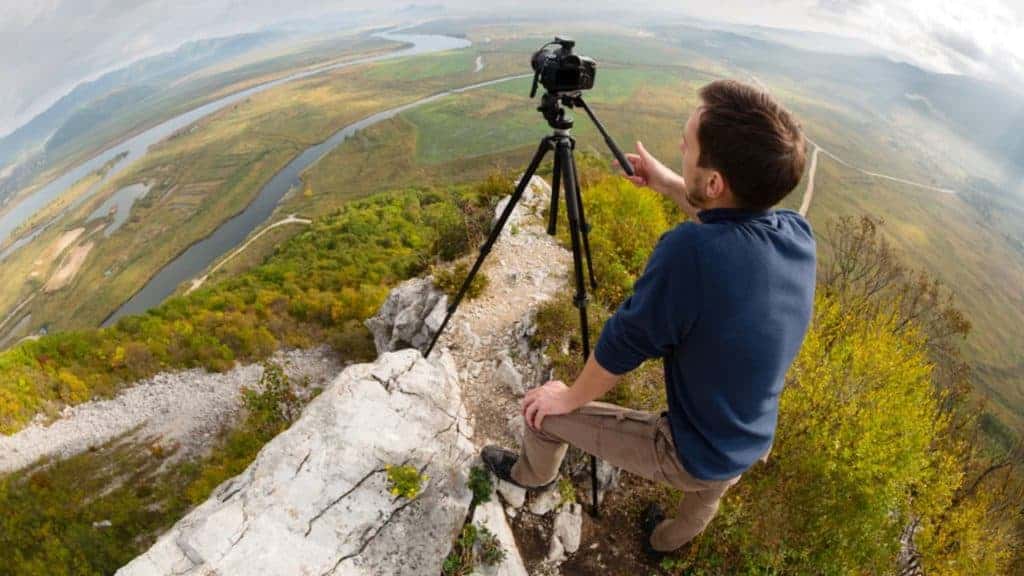
Use a Quality Tripod and Filters
A tripod is a must in a landscape photographer’s arsenal. You may need slow shutter speeds to compensate for your chosen small aperture, which means additional camera stabilization. You can’t get technically perfect shots at every shutter speed when you’re shooting handheld.
This thing is even more useful when the photographer uses a remote control to release the shutter for additional camera stabilization.
By the way, bracketing software like Luminar Neo and using a tripod go hand in hand when it comes to capturing high-quality images that require multiple exposures.
In addition, filters can help you achieve specific effects in your photos, such as reducing glare, increasing contrast, or enhancing color saturation. For example, a polarizer can help reduce reflections and make colors pop.
Don’t Forget to Include the Sky
This is a very important thing. The secret of nature photography in most cases is that the sky or foreground dominates the image. Look at your photos, if it’s not, it’s likely to be considered boring and of little interest.
If the sky wasn’t dramatic during your session, don’t let it dominate — move the horizon line to the top third of the photo, just make sure the photo doesn’t lose any more.
But if the scene is full of dramatic clouds or colored in uncharacteristic shades, the sky can be your ally. Give it more space in your image and you’ll see how much of a winner such a deviation from the rules can be.
Also, consider using an HDR photo editor. With Luminar Neo, for example, you can adjust highlights, mid-tones, and shadows to bring your unique vision of landscape to life.


